Guidelines
Click on a section header to expand or collapse the guidelines. Alternatively, download a pdf of the guidelines.
Registration
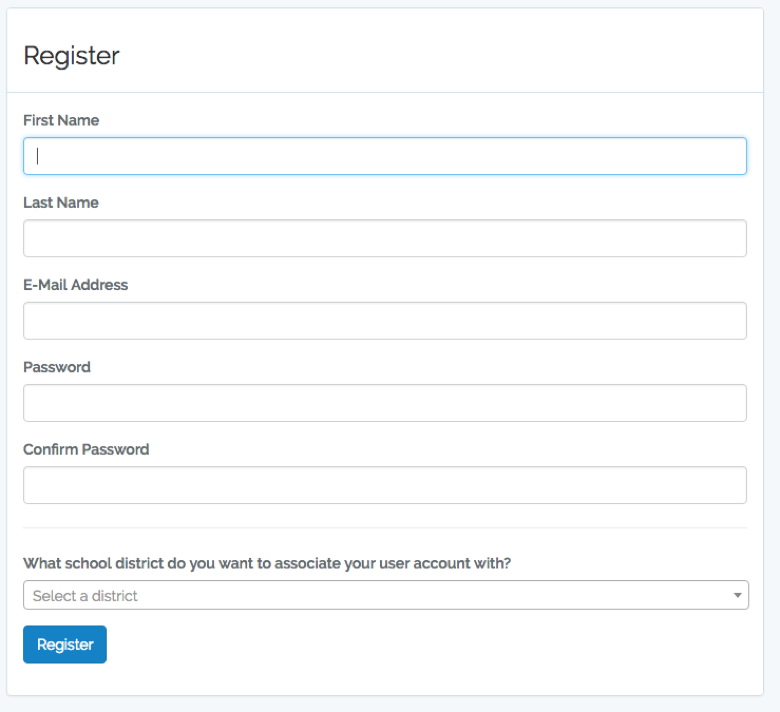
Before you begin your application, you will need to create an account. You can accomplish this by clicking the register tab in the top right corner of the browser. Make sure to register with your district email address.

Some site functions will be blocked until the TEA approves your email if you sign up with a non-district email. Your account will be verified via the email you sign up with and you cannot sign in to the portal until your account is verified.
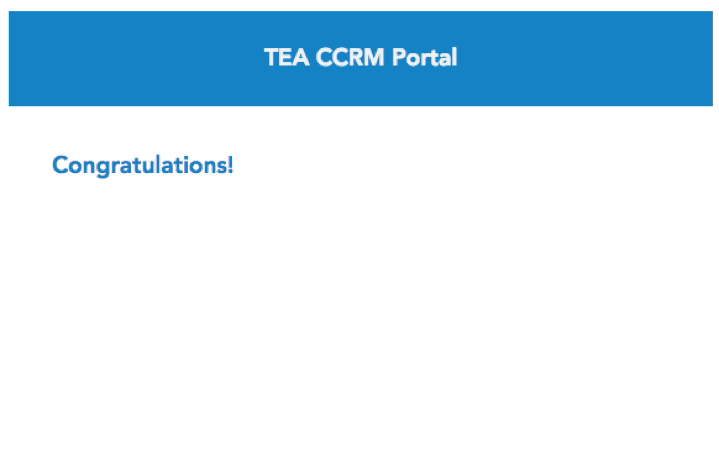
The following message will appear at the top of the screen upon successful registration:

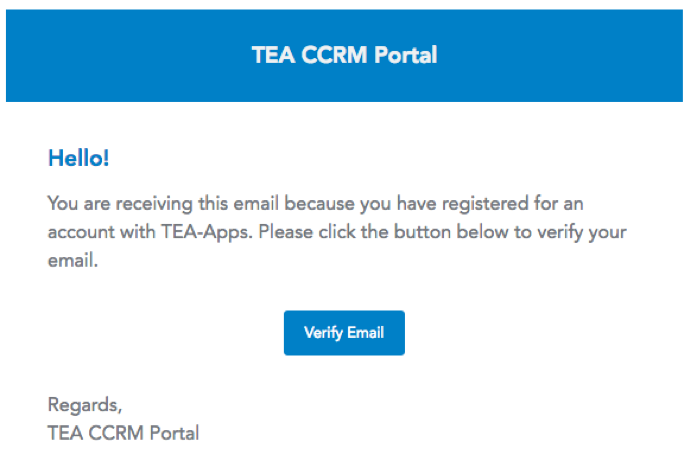
You will then receive a verification email from the TEA CCRSM Portal. You must click the Verify Email button to log in.
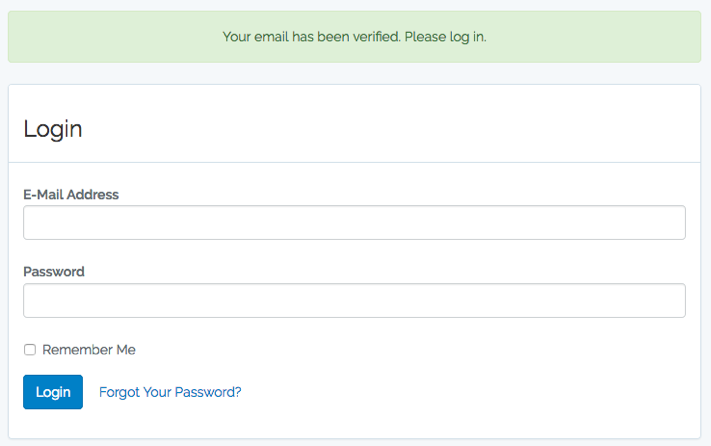
Once verified, you can log in.
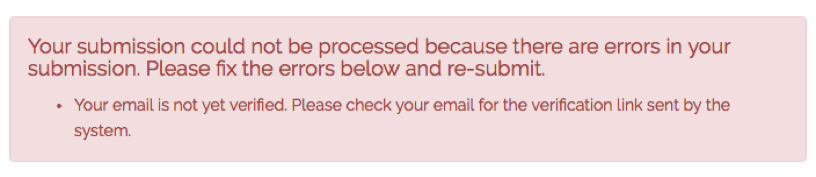
If you try to log in without verifying, you will get the following error message.
If you registered with a non district email, the following message will appear,

and you will not be able to create new applications.

Once you have completed the registration process, you can start an application.
Overview
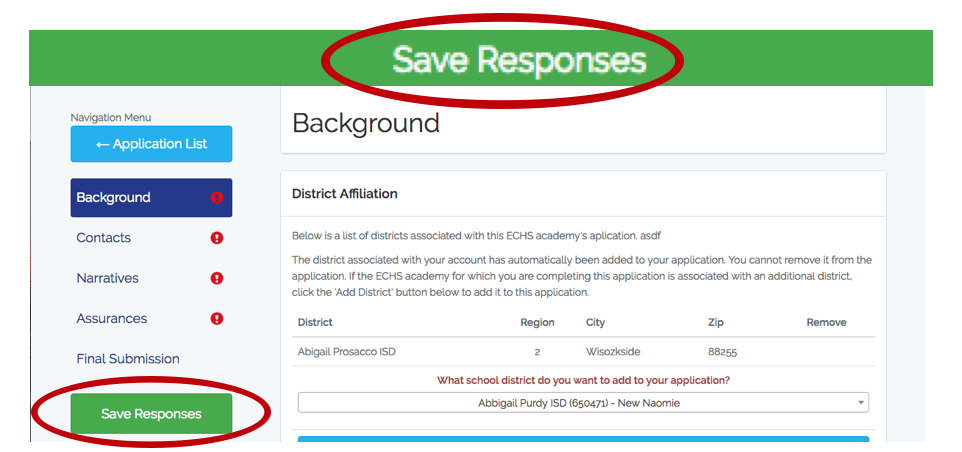
Saving: On each page inside of your application, there are save buttons labeled ‘Save Responses’.There is one below the navigation menu and one that appears as a banner at the top once changes are made. Clicking either will save the responses entered so far and reload the page. The application will also auto-save after each successfully entered response. See below if you get an error message.
Invalid responses: If the form finds an invalid response while trying to save, a red error message will display at the top of the screen, indicating which field contains the error.
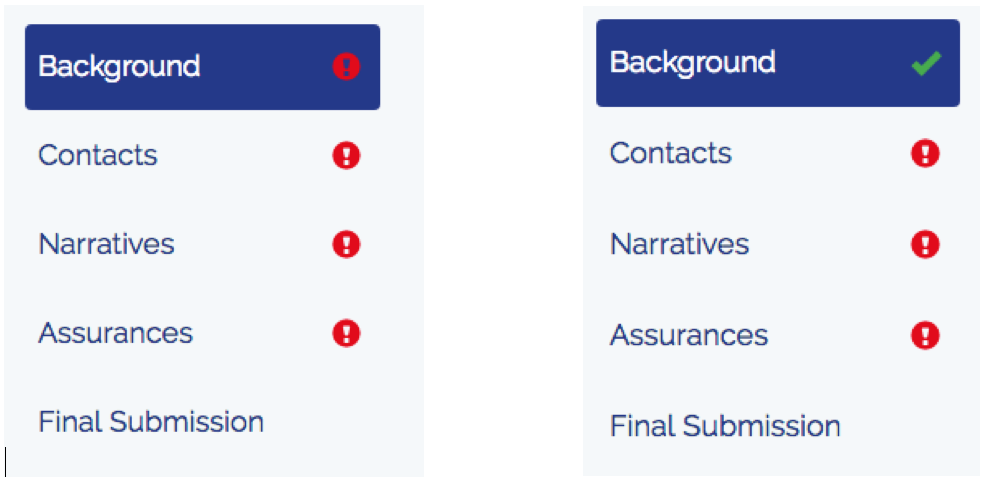
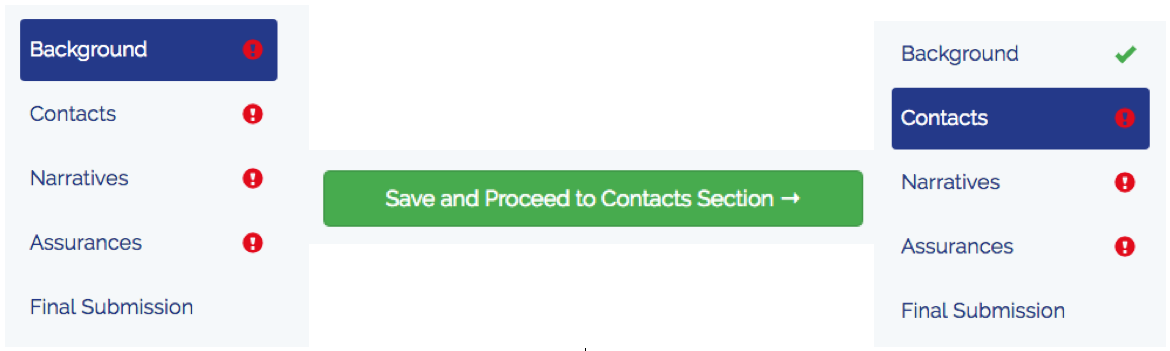
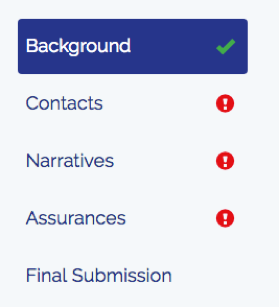
Checkmarks and Exclamation points: Next to each section of the navigation menu, there will be either a red exclamation point, indicating that the section is incomplete, or a green check mark indicating that the section is complete.
When all the required information has been entered and saved, the red exclamation will change to a green check.
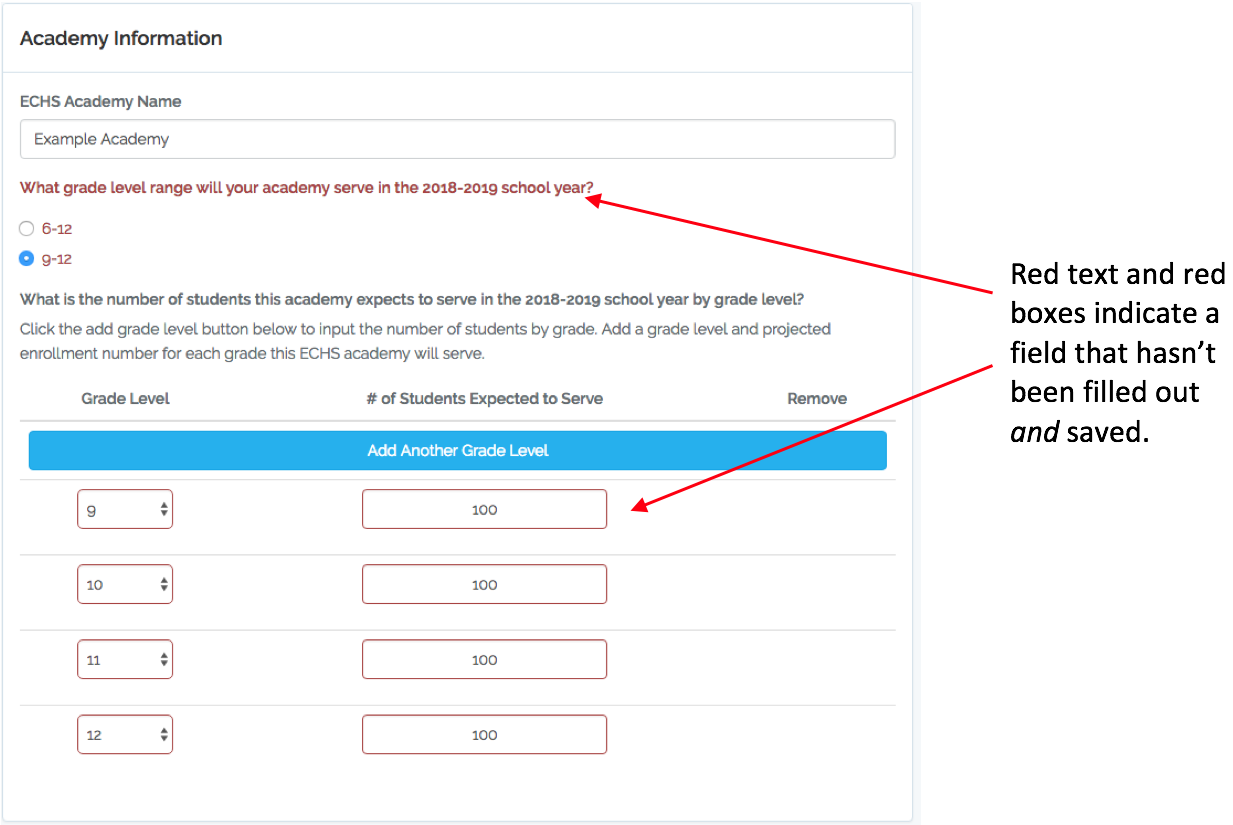
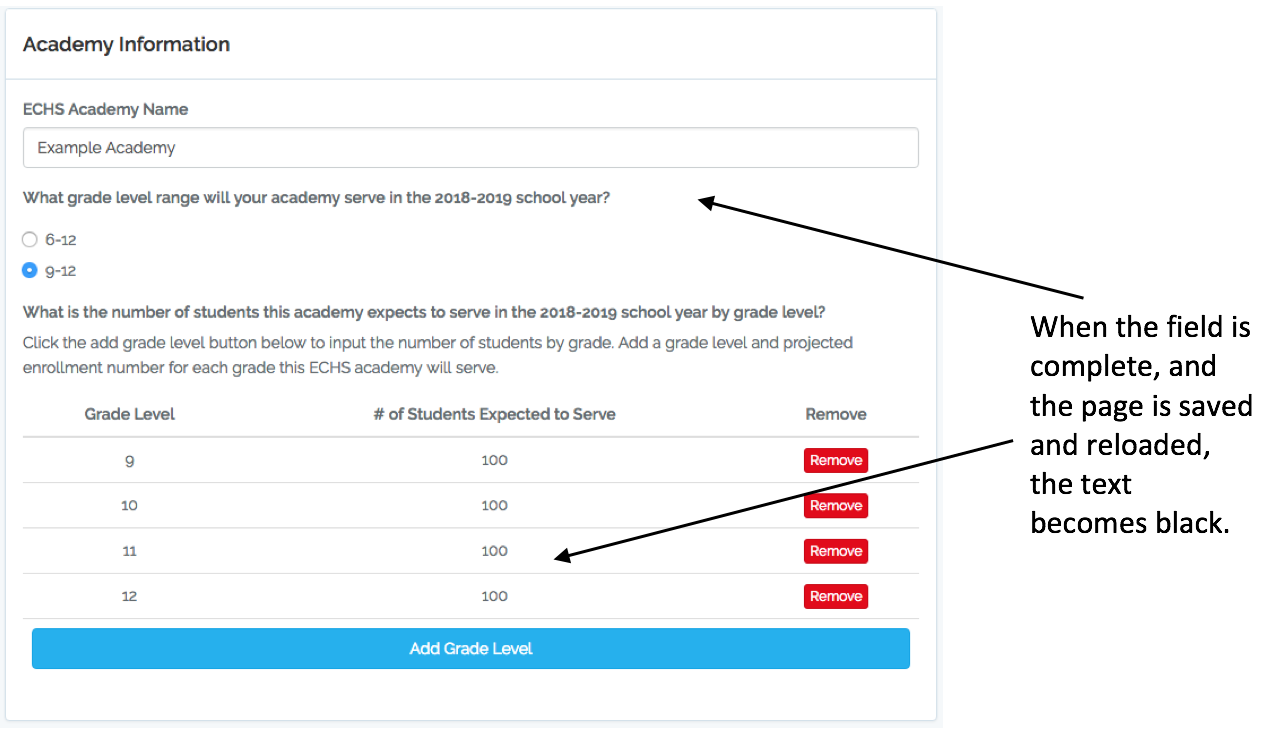
Incompleteness: A field that is incomplete will be red. It will change color when it has successfully been filled out and saved.
Proceed and Go Back buttons: At the bottom of each section, there will be buttons that say “Save and Go Back to ____” and “Save and Proceed to ____”. They will save the data you have entered and take you to the previous section or the following section.
When in the Narratives page, the buttons that appear offer to save and go back to the Contacts page, or to save and go to the next page, Assurances.

For example, in the Background section, you can enter the required information, then click Save and Proceed to Contacts Section. You will be taken to the Contacts page, and what you entered for Background will be saved.
Starting an Application
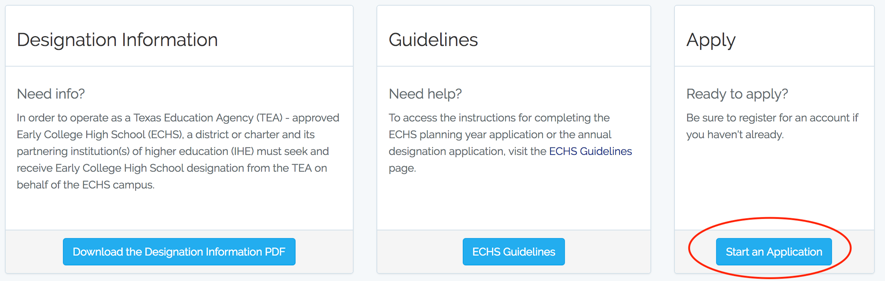
Click on a CCRSM Model in either place it appears on the home screen.

Click the ‘Start an Application’ button
Select Create a New Application

Select the Planning option and type in the name of the academy. Click Submit.
Your academy will now appear under Current Applications. To start start filling out the application, click on the name or Open Application.
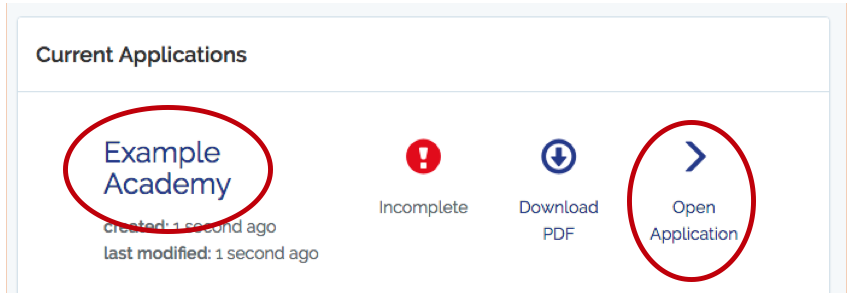
At any point, you can click Download PDF to generate a PDF of the application and save it to your computer. The button appears as above on the applications page, and also as a link within the application.

Background:
Here you will fill out district and school affiliations as well as the number of students the academy expects to serve for each grade level.
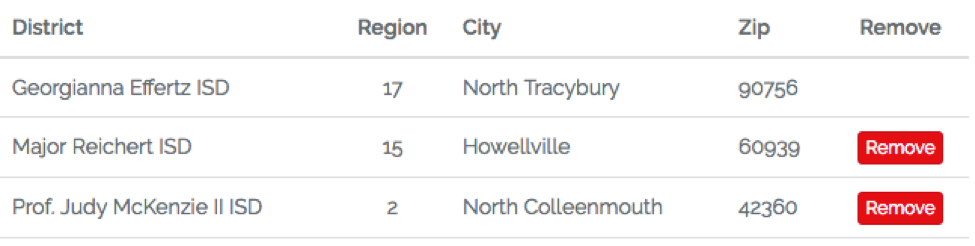
District Affiliation: Add one district at a time using the Add District button, which becomes Add Another District with each subsequent district added.

Select as many districts as you need.
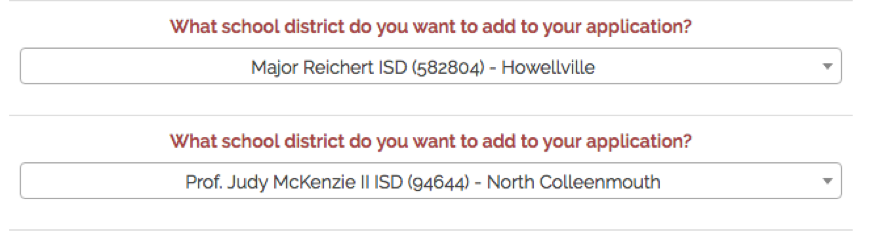
Click Save Responses to update the application and save all data you have entered.

If you selected the wrong district, you can always remove it using the button on the right. You will not be able to remove the district associated with your user account. All applications you create should be associated with your district.
School Affiliation:

Click Add School to add an existing school (with a CDC number). Select the school from the drop down by scrolling through the list or by typing the name or CDC number of the school you want to add.

To add a school without a CDC number, fill out the information as prompted. When complete, click the green Save Responses at the top of the page or on the navigation menu. The list of affiliated schools will update. If any information was mis-entered, the school can be removed and re-entered.

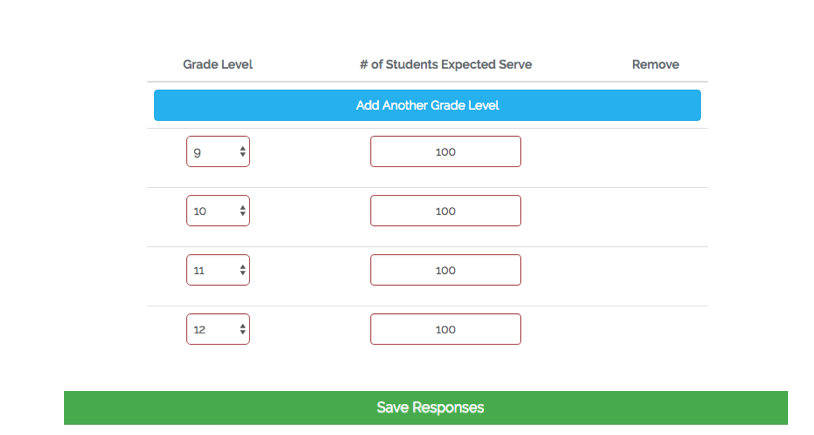
Academy Information: Select grade level range and enter info about the number of students in each grade level the academy expects to serve in each grade level.
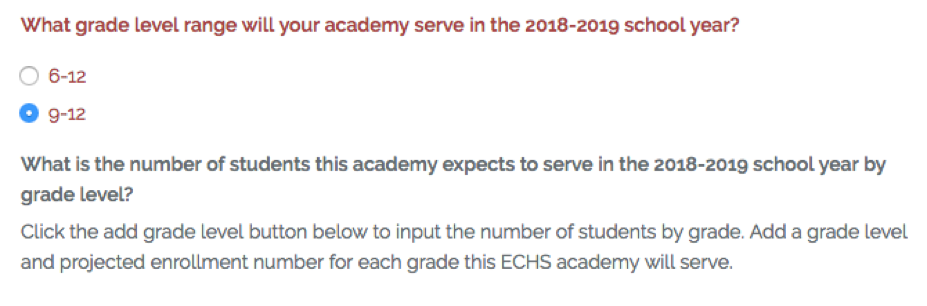
After selecting the correct grade level range, click Add Grade Level. One grade at a time, select the grade level from the drop down and enter the number of expected students for that grade level.
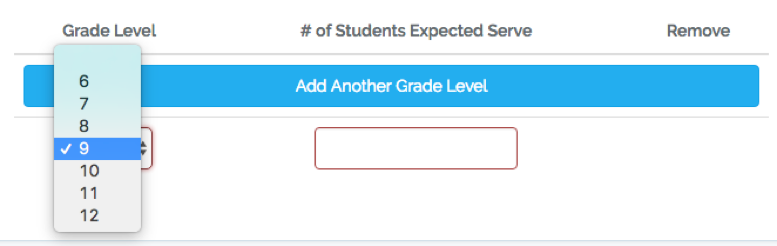
When all grades have been entered, click Save Responses.
In the navigation menu, the Background section will have a green check if all requirements for the section are met. If it still has a red exclamation point, some information is missing. Check each section to make sure everything has been filled out and saved.
Contacts:
fill in information about each contact. Make sure each email address is correct.
Fill out the contact info for the superintendent. Fill out your own info under Applicant.
Add one IHE + Liaison contact at a time. Make sure to click Save Responses between each contact.
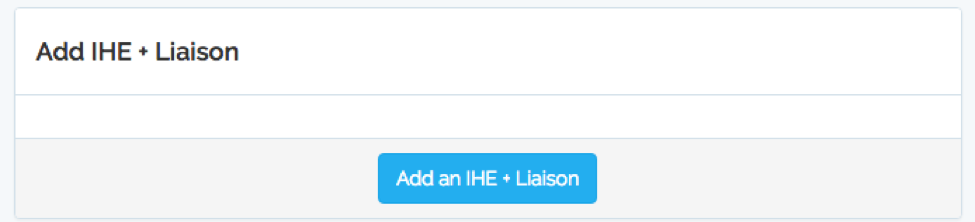

If any information was entered incorrectly for an IHE + Liaison, the contact can be removed.

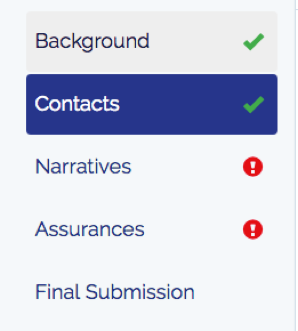
Once all of your contacts are entered, the navigation menu will have a check next to Contacts.
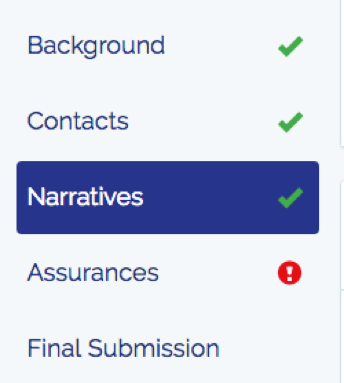
Narratives:
Respond to required questions. The maximum word count for each text field is 500.

Saving a copy of your narrative responses on your computer ensures that work does not get lost.
When every field has been completed and you have clicked Save Reponses, the navigation menu will have a green check next to Narratives.
Assurances:
Upload the signed assurances signature page.
The Assurances PDF is available to download at the top of the page.

It must be downloaded, signed by the authorized school district or charter, signed by the authorized institution of higher education official, and then uploaded as a PDF.
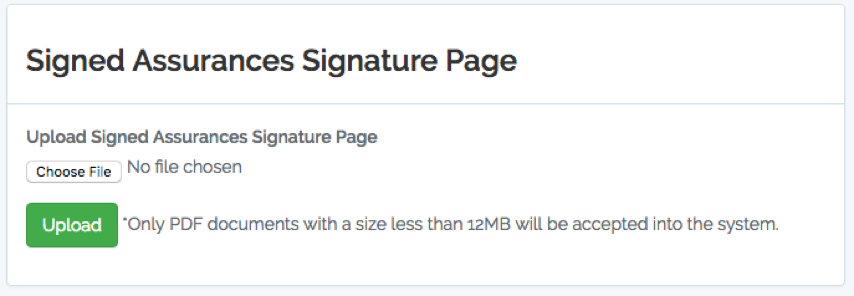
When you click Upload, the page will refresh and you will see a success message if your document was accepted.
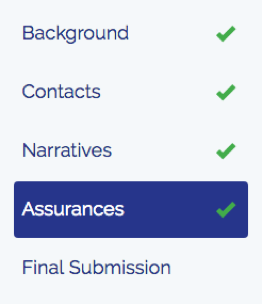
Proceed to the final submission section if each of the sections has a green check mark.
Final Submission:
When you are sure no further changes need to be made to your application, submit the application to the TEA for review.

You will be taken back to the My Applications page and you will be receiving a confirmation email shortly.
Under Current Applications your academy will now be marked submitted.
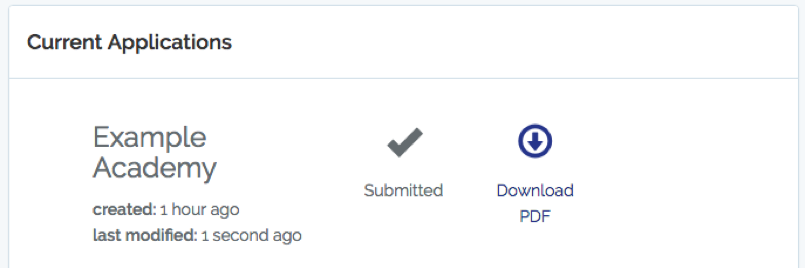
You will receive an email about your submitted application.